Good Day All –
I was creating a new Business Process Flow this morning and I felt there were a few items that I would like to share to make your experience easier when configuring these for your individual businesses.
Reason for Business Process Flows:
“You can help ensure that people enter data consistently and follow the same steps every time they work with a customer by creating a business process in Microsoft Dynamics CRM 2015 and Microsoft Dynamics CRM Online 2015 Update. For example, you might want to create a business process to have everyone handle customer service requests the same way, or to require people to gain approval for an invoice before submitting an order.” (1)
Using Business Process Flows will assist your organization follow consistent processes throughout the application. Configured properly you can lead your users of the system into next best actions including launching workflows and business rules.
Business Process Flows can be set up to prevent movement from one stage to the next unless valid data is entered into the system, (called stage gating). You can enforce stage process analysis through reporting by enforcing consistent processes. Finally, you will have the ability to move a user from entity to entity since Entity Business Process Flows can be configured to create or link related entities to the primary entity.
Three Methods for Access the Business Process Flows:
There are three methods of accessing a Business Process Flow:
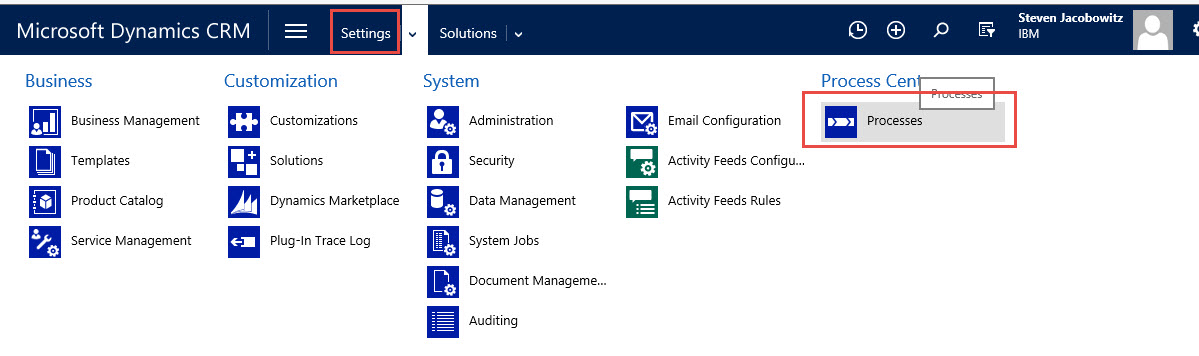
- From the Settings tab you can create Entity Business Process Flows through the Processes tile
2. By accessing the Default Solution by clicking on Setting Tab and clicking on Customizations Tile
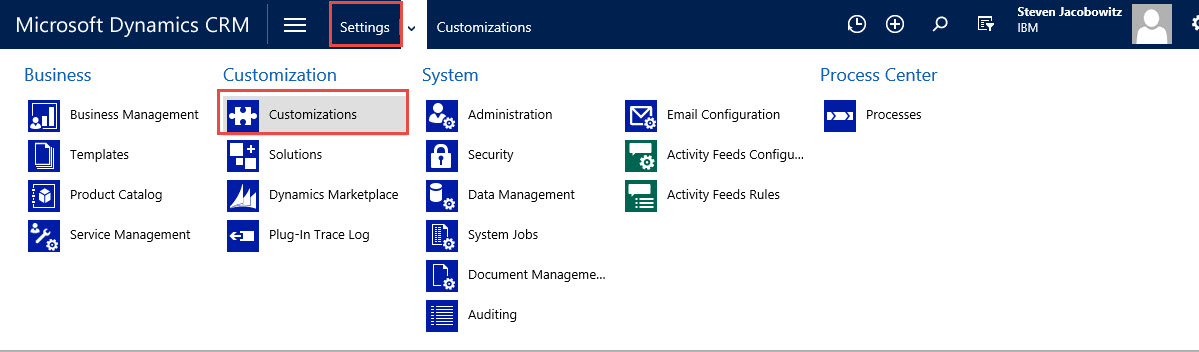
Then click on Customize the System Menu Option

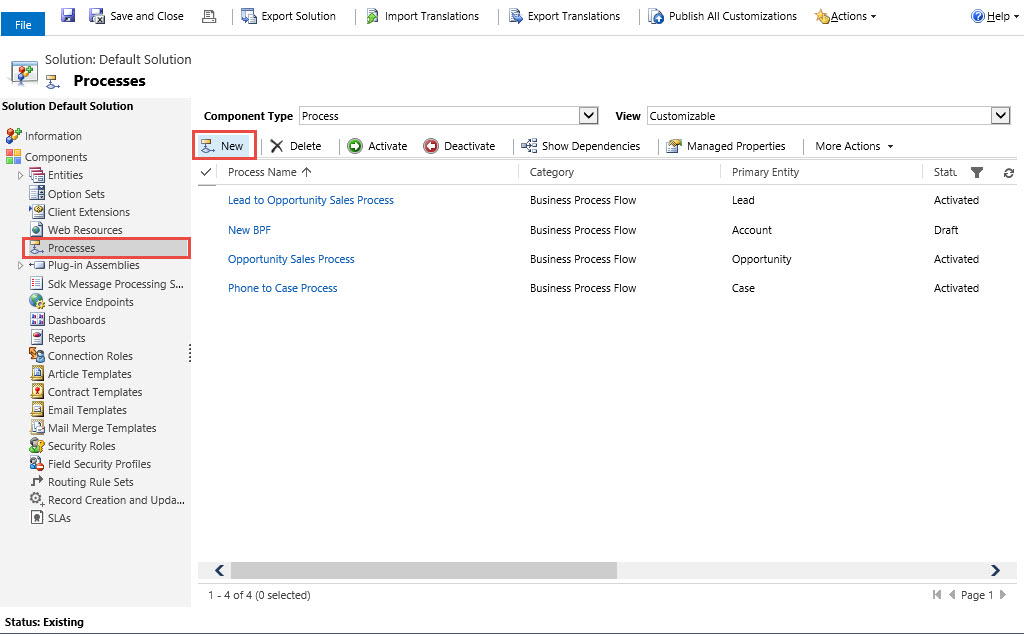
Expand the Components Click on Processes and then New
3. By accessing through a Solution Set, (My preferred method).My reasoning is I am not changing the default CRM solution and I would be able to move the solution with all configured Business Process Flows through a Managed or Unmanaged Solution set.
Click on Settings, Solutions

Click on New Button, Define the Solution parameters than click on Save

Once saved you can click on the processes tile from the left navigation and click New

Tips and Tricks:
Setting Stage Category Option Set Values
Stage category option values are important for entity business process flows for reporting and dashboard requirements. Setting up reporting based on Entity process flows by using the stage values as identifiers will allow you to view data based on stage position in the process. If the process is accurate and your agents are working the processes consistently you will be able to forecast results based on stages. In addition, using terminology that is familiar to your agents and your business processes will enhance the adoption probability. Let’s try it out.
All Stages are identified in a global option set called Stage Category. To access open up your solution, click on the option set tab.
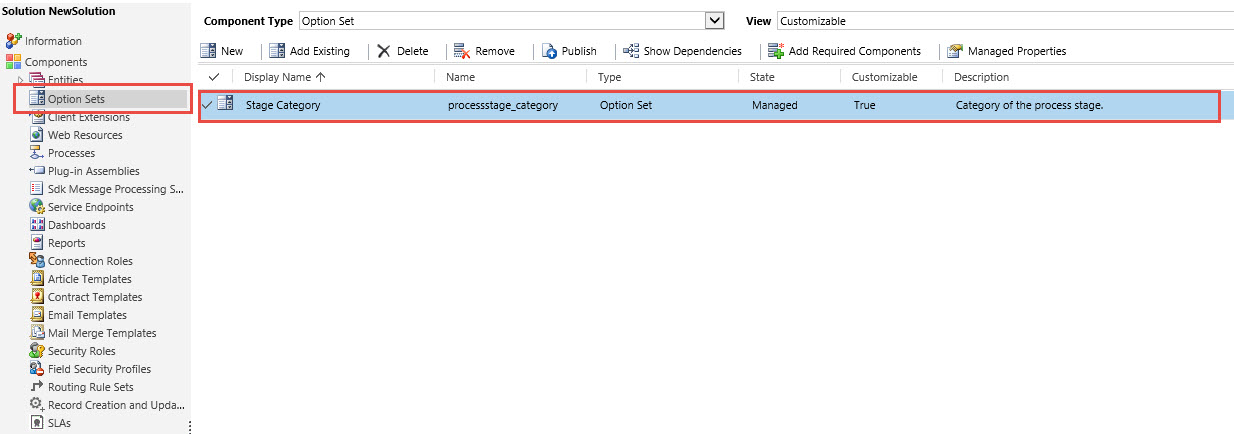
Open by double clicking on the display name.

These are the out of the box stage categories, you can add additional by clicking on the + sign to configure for your processes, or you can edit the items by selecting one and changing the label from the label option on the right.

Always Remember to Set the Stage Category
After you define the option set labels, you can configure the stages using terminology familiar to your agents as well as the stage categories familiar to you for reporting purposes.
Go to your solution -> Processes and click on new to create a new process or double click on an existing business process flow to edit.
![]()
When creating a new process flow you will be required to give it a process name and also a category. (The category defines the new process item as a business process flow)
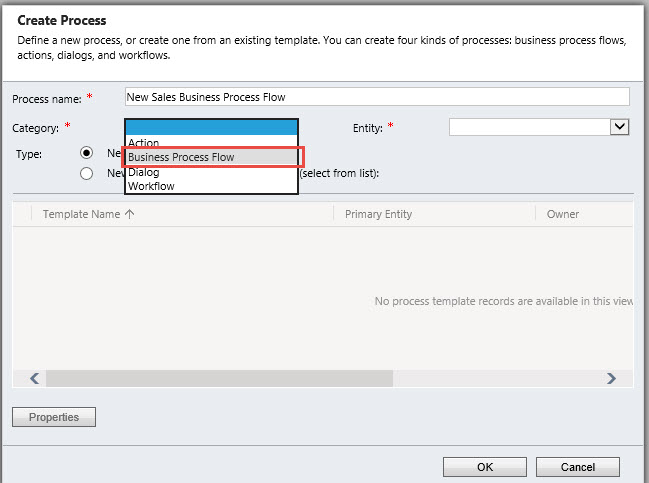
Choose the entity you wish to originate the process from, (in this case we will be using opportunities).Then click on OK.

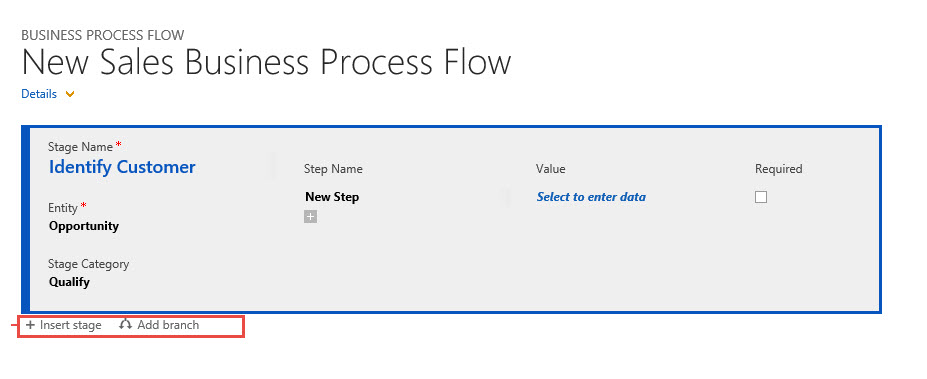
Your next screen will be the business process flow workbench.
Notice there are several actions you can perform. On the very top left of the initial stage change the “Enter a stage name identifier” to the first step in your process, (Tip use common terminology embraced by your organization).

Also assure you identify the proper stage category, (as mentioned previously this will assist you in your eventual reporting requirements).

Notice on the bottom of the stage there is a menu item for creating additional stages and branches.
Branching Business Process Flows – Introduction
Stages are configured when there is no need to alter a linear process. Branches are configured when an action occurs that would potentially require and if/else branch in the process.
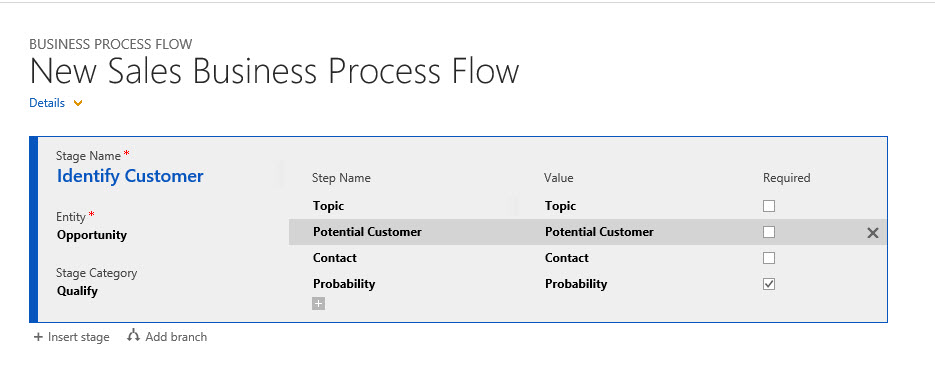
Movement of Step Attributes within the Stage.
Finally identify values and step names within a stage are the attributes you would like to have entered into the record based on the stage in question. Please note you can use attributes from the entity you have defined when creating the process flow only in the first stage. After this first stage in subsequent stages you have to option to create based on related entities to the primary entity, for example, Phone Calls. (Much more as we move forward).
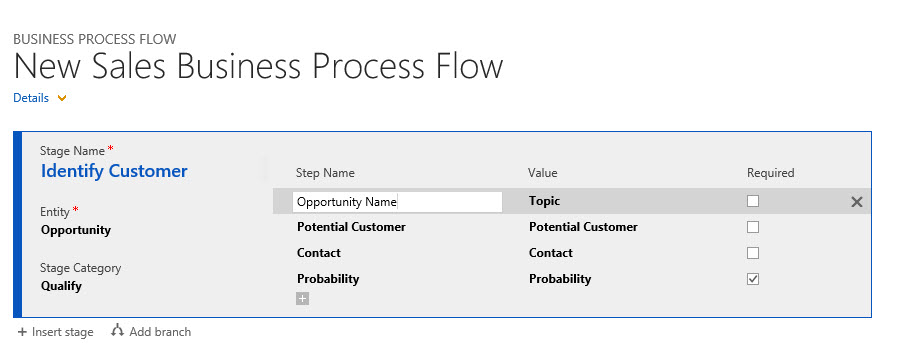
Notice under the step name the default identifies are the default names of the attributes I selected for the stage. You can modify the step identifiers by clicking in the attribute and re-typing a new name.
Also notice on the right of each attribute there is a checkbox for required. You can use this to require input. This is helpful if you want your agents to fill in information required. By creating a required attribute you will prevent your agents from moving to the next stage prior to completing information in the stage, (called stage gate).

I can see that I am getting long winded again so I am going to end this post after I go over a few last items, and will take up the remainder in next week’s entry.
Thus far we discussed the reasons for the use of entity business process flows, and how they will assist your organization maintain consistency. In addition, they will assist your users with next best actions when moving through a business work stream, thus providing you with reliable reporting. We went over the methods for creating a new business process flow and my recommendation to always configure in a solution set. Finally I provided a few tips and tricks during the configuration process as well as a few best practices.
Next week I will fully define a scenario so the remaining best practices will be easier to follow. In addition I will complete the tips and tricks section with the following items:
- Branching Business Process Flows – Conclusion
- Movement of Stages in the Process
- Enabling Security Roles
- Order Process Flow
My intentions are to assist in your understanding of how useful process flows are for your organization.
One last tip, please validate your processes, make sure they work in your organization. My last words “A poorly planned process automated will only provide you with poor results faster”.
As Always,


Good stuff Steven. Very timely too -this is on the agenda in our training tomorrow! Thanks to your post I’ll be ahead of the game. -Ted