Overview and creating your first survey.
About 4 months ago, Microsoft announced it was going to sunset Voice of the Customer for survey creation and replace it with a new product call Microsoft Forms Pro. I have worked with both products and am convinced that Forms Pro is easier to work with for creating surveys and online quiz documents. The product is all point and click.
The good news is, if you own Dynamics 365 CE, you will have licensing for this new functionality as part of your licensing agreement.
I would say the goal is to make Forms Pro part of the Power Platform as it is already integrated to Dynamics 365, Office 365 and the Azure clouds. Therefore, most of the integration you would need would continue to carry forward on Microsoft’s promise “To empower every person and organization on the planet to achieve more.”
Microsoft is demonstrating the clarity of this vision with respect to Forms Pro.
Forms Pro allows you to:
Create professional surveys no matter your skillset
- Develop customized, on-brand surveys with your company’s look and feel using AI-assisted suggested questions.
- Incorporate sophisticated survey functionality like advanced branching, skip logic, individualized survey links, and multilingual capabilities.
- Reach your audience with timely, mobile-optimized surveys distributed through email, QR codes, webpages, and apps.
This is truly low and no code configuration. The product is very intuitive to learn, (I think I was able to create my first survey in about 15 minutes), after that I was able to build on my experiences by hunting around the product and discovering the additional built in functionality.
Integrate data with your business applications
- Engage with respondents at the right moment by automatically sending surveys based on trigger events.
- Increase response rates by personalizing questions based upon integrated data from your CRM, ERP, or HR systems.
- Integrate results and view survey responses directly in Office 365 and Dynamics 365 to enhance business processes and gain a more comprehensive view of your customers.
This functionality is integrated into Microsoft’s 3 cloud strategy and by default if you use Microsoft Flow you would be able to enable the already created 250 built in connectors to other applications or create your own custom connectors. The business outcomes include quicker time to market as well as, business value by enabling less skilled individuals to work with this product.
Take informed action with AI-driven insights
- View real-time results in Forms Pro or integrate data seamlessly with Power BI for advanced analytics.
- Monitor the pulse of your workforce or customers with AI-driven insights, including sentiment analysis, trend identification, and keyword detection.
- Identify and act on opportunities by using Microsoft Flow to create triggered actions or notifications based on survey responses or sentiments.
Forms Pro includes built in analytics, therefore, you will be able to gauge your success out of the box with no additional configuration or integration. These reports are hosted on Azure and have AI features included to maximize the business value of the offering.
Creating your first survey
Scenario Defined –
Contoso Commercial Bank would like to analyze the performance of their product specialists. They are currently using Dynamics 365 Customer Engagement. All opportunities are stored within the application. When an opportunity is closed, either won or lost, Contoso would like to send automatically a survey to elicit feedback about the sales process, whether positive or negative.
Contoso’s principals have heard about Forms Pro and would like to accomplish their objectives above using this product. Your job is to realize their vision using Forms Pro.
Let’s get started:
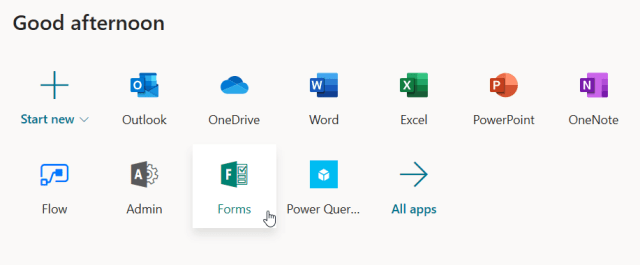
There are a number of ways to access Forms-Pro, initially you can go to your admin portal on Office 365, if you have had this functionality turned on for your profile, you will find this icon amongst your applications. Click on the icon.
(Note: There are other options for access, I will get to administration during part 2 of this series).
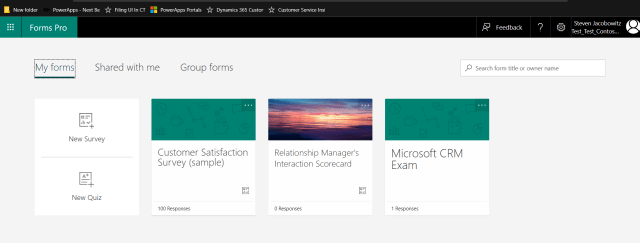
Initially when you open the application you will be presented with the following screen. (the relationship managers scorecard will not be there as we are going to build this during the exercise).
Please note this application behaves exactly like all other applications associated with the Power Platform. On the upper right-hand corner, you will notice the environment dropdown, (see below).
(Reminder: Make sure you choose the environment instance you wish to use for the survey or quiz. By doing so you will be automatically connected to the correct CDS environment).

We can follow the wizard to create our first survey. Click on the create new link on the middle of the page.

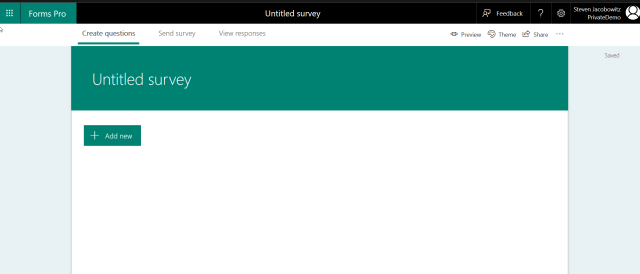
The next screen you will view will allow you to manipulate your survey form. It is very simple to use.
Creating a Theme:
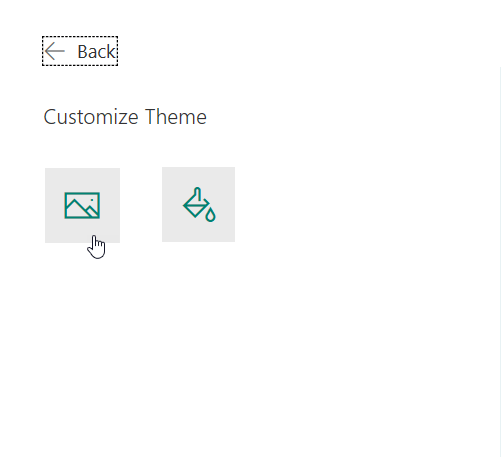
I usually start by changing the theme of the form, your options are to change the form colors, add an image or upload your own image, either by uploading from your computer or One Drive.
Click on the Theme icon on the white command bar. If you would like to use your own theme click on the + (add new) icon on the next screen.
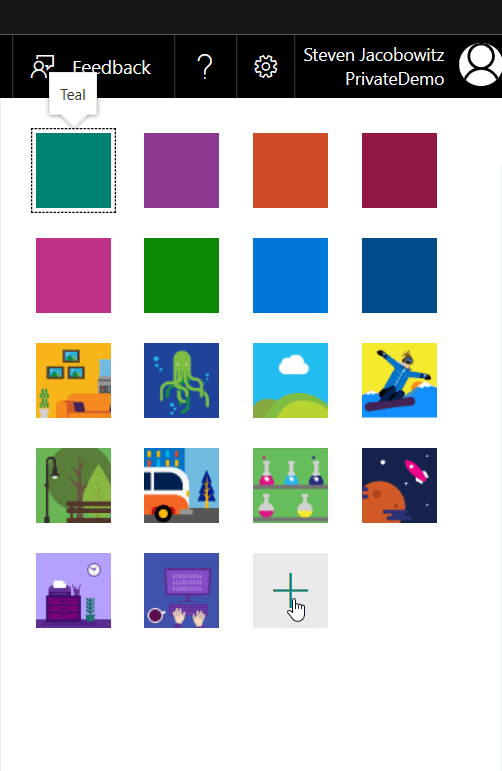
You will then upload the image from the source of your choice, or the custom color you wish to deploy.
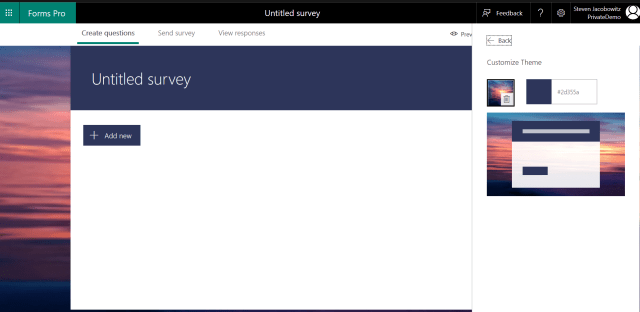
Click on the option, in this case we will be using a custom imag Select the image of your choice click on the upload option.
When completed notice how Forms Pro changes the background with your image selected and the header of the form with a color that matches the image, (this is automatic).
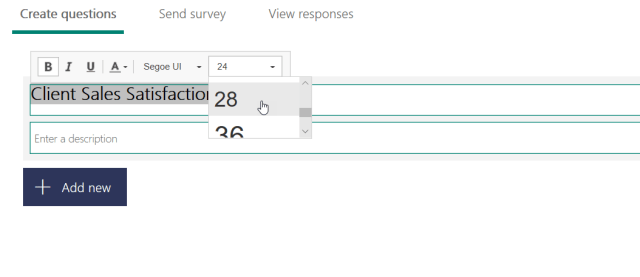
Renaming the Form:
Before you start adding questions you should rename the form. Click on the header section. You will open a new dialog box, (below); here you can give your survey a name and a purpose. At this point you can also manipulate the size of the text and the color of the font using the controls available on the form, (this is all point and click
At this point your survey should look have its own identity.

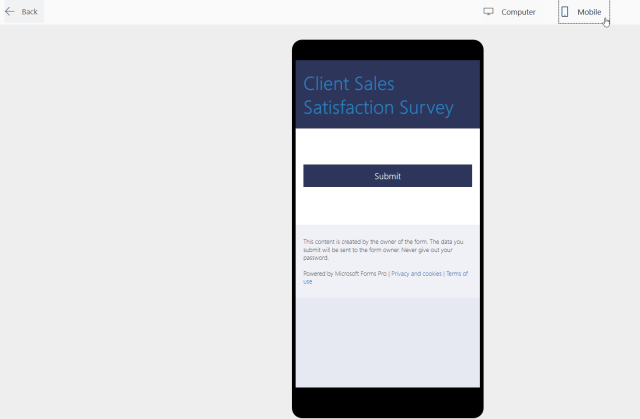
Notice on top right of the form, you can go into preview mode, either computer or Mobile.
(Hint: I usually use these buttons often to check the progress of the survey building).
Adding Questions:
At this point click on the + (Add Icon) on the body of the form.
Your question options are as follows.
Select one of the options it will immediately render on the form.
(Note: each one of the question types have different options and behaviors I will briefly describe each of them below).
Your Question Options:
Choice

Choice Options:
Notice the choice question renders as a single choice option with two choices. (Radio buttons). You can control the font color as well as the Multi-Select option, (turning this on will change the radio buttons to check boxes). You can also select required which will make the question mandatory. In order to add additional option selections, click on the + (add icon).
There is also a visible option. (We will discuss this feature on Part 2 of this series on administration. Visibility is a very powerful tool and is mostly used during branching scenarios where turning on additional questions based on a specific answer to a previous response.
Finally, all questions have additional options accessed through the ellipsis. When you click on the choice question more options, you have the ability to add a subtitle to the question as well as making the choices available through a drop down list.
(Additional Bonus: Look to the right of the actual question, there is an image icon. Forms Pro has the functionality to allow you to add a pictures or videos to questions. I will present an example in the Text section below. This is helpful especially when you want to elicit a response based on a visual queue rather than just a text question).
Text

Text Options:
In the above the picture there are 4 icons:
- The 1st allows you to copy and past the question on the form again, for example you need a few questions that require text answers, you can create a copy of the question, paste and change the question keeping the original formatting
- The 2nd icon will allow you to delete the question.
- The 3rd and the 4th icons will allow you to move the question from its original position to a different location by using either up or down arrows.
On the bottom of the picture on the right:
You can change the answer from a single line answer to a multiple line answer. Required and visible have the same behaviors as mentioned on the choice question. At the ellipsis option you could create a subtitle to the question.
Rating
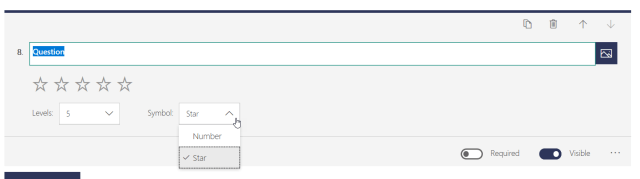
Rating options:
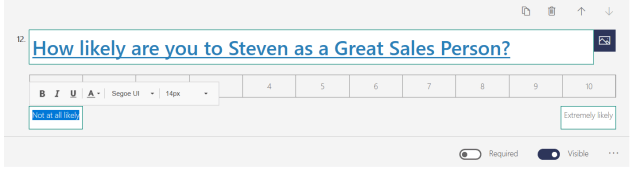
You can change the interval from 1-10 or any number in between. For this example, I am using 5 figures. As far as the symbol you can change it from stars or numerical value, in the above I am using stars.
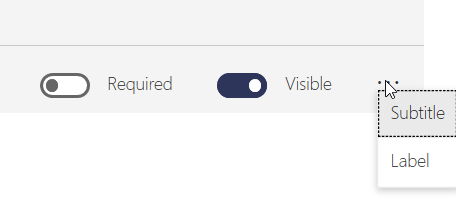
If I use the ellipse value of label, I could assign terminology to the lower and upper values of the rating scale.

The question would render as follows when presented to a respondent.

Date

Date Options:
For date it is just that a date input. As you can see from the picture above there is very little you can do to manipulate this question control.
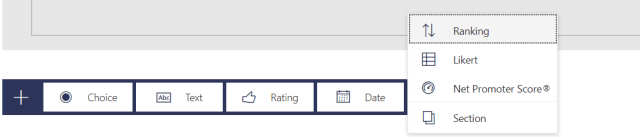
Ranking

Ranking Options
The only additional options you have with the ranking question is to add additional items. When the form renders you are left with the following view.

Notice to the right of the options there are up and down arrows allowing you to stack rank your answers from most important to least important.
Likert

Likert Options:
You have normal control over the Likert question. You can add additional options and you can change the text including the attributes such as fonts and color. In addition, you can also create your own terminology for the option headers. Click on any of the title headers and you can define the ratings in your terminology.
Your finished Likert question will render as follows.

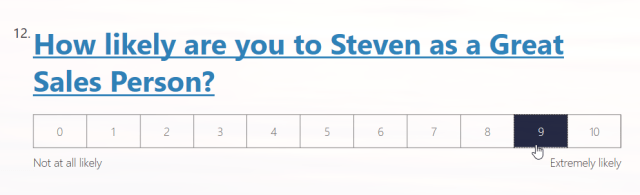
Net Promotor Score ®
NPS Options:
There are very few options available to the Net Promotor Score Question. Fill in the question and you can also define the lower and upper rating scale headers by clicking on the title box and creating your own interval names.
When rendered the respondent can choose one number, (below), to answer the question.
I am going to end Part 1 here. You have now completed your first survey. When you test the form factors of the survey your completed product should resemble the following:
I am planning Part 2 of this series to present the following topics:
• How to personalize a survey
• How to create sections
• How branching works on surveys
• How to administer Forms Pro
• Using the reporting features
• How to incorporate Flow and Dynamics 365 into the process
• How to access Forms Pro within the Dynamics 365 Unified Interface
I hope you found this topic interesting and are now as excited as I am about creating surveys and quizzes using Forms Pro.
Any suggestions contact me at stevenj@precisioncrmsolutions.com
Have a good week, and be cheerful,