Sorry I was a little late with the post this week. I had a few items on my plate and didn’t have the time to pay attention to this second part of the blog on Forms Pro and Microsoft Flow.
In the future, I would like to drop these helpful tips on Tuesdays, although, life happens, therefore, I am going to commit to trying to get one out every week, and would like to make it on Tuesdays. 😊
Review:
Last submission was about how to access Microsoft Forms Pro, creating your first document, working with the different types of question controls and to administer this first survey. Please click here to review.
In this article I would like to discuss the following topics:
- Personalization
- Auto Access to the Application
- Sending Options (Integration with Microsoft Flow)
In Part 3, (next week), I will finish up with these last topics.
- Administration
- Reporting
- Branching Surveys
- Sectioning off Surveys.
- Personalization of your Survey:
It is one thing to get a survey that appears to be auto generated from a list, from my point of view it feels stuffy and impersonal. Did you know with Forms-Pro and the Common Data Service connections you can pass parameters from the CDS to Forms-Pro to allow for Personalization?
Let’s look:
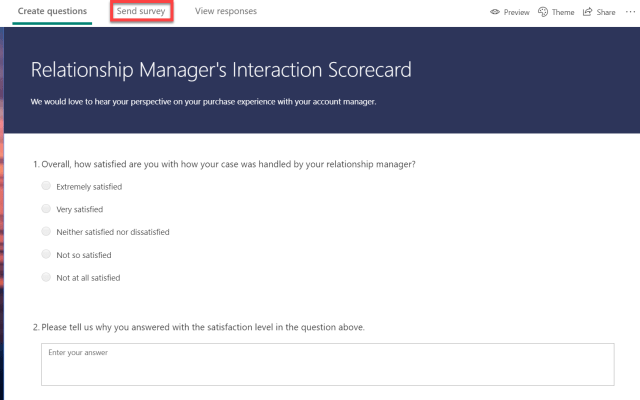
- Start of with the survey you would like to personalize
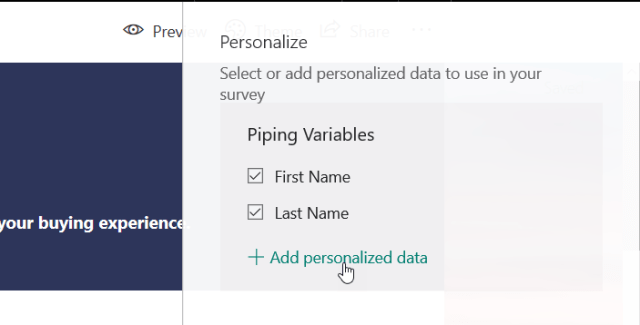
- Click on the ellipses and click on the personalize option, (below)

- The next screen, (below) describes the Piping Variables out of the box, (all connected to the CDS)
- You can also add additional personalized Piping Variables out of the box, (all connected to the CDS)
 a. Select the variables you would like to expose on the survey
b. If you decide to include personalized data click on the +Add icon.
- After you select the variables you wish to include on the survey adding them to the survey is easy
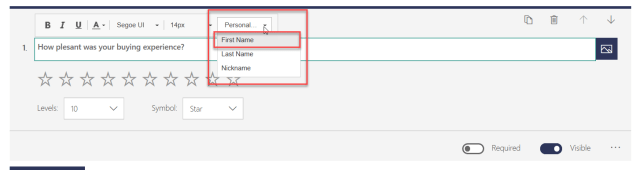
- Place your cursor anywhere on the survey, (Header, Header Description, or the Questions)
- Click on the personal button and select the variable(s) you wish to use.
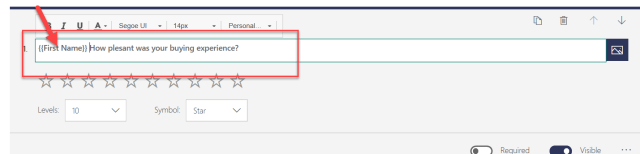
- After you select the variable your final personalized question will look as below.
- Using a Solution to allow Ease of Access to Forms Pro
There are times when an operator of Dynamics 365 would like to gather perspective from their clients on their performance. Below is an easy method for allowing access directly to the surveys they wish to send. (I am only using one survey in this example, although, it is possible to repeat these procedures for additional surveys.)
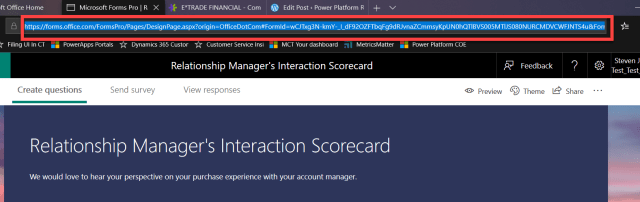
- Open the survey you want to give users access to, to manually send to clients.
- Copy the URL of the survey
- Go to the Maker Portal in PowerApps (https://web.powerapps.com)
- Select the correct environment (1)
- Select or create the solution you would like to work with (2) Below:

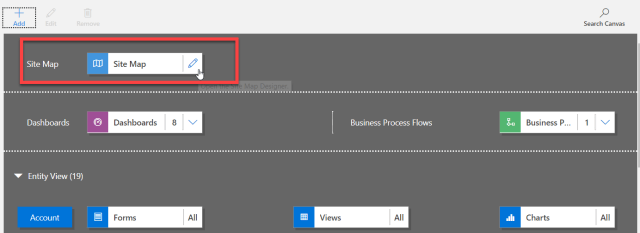
- Open the model driven solution

- Select the sitemap option on top click on the edit pencil.
- Select the group you wish to edit and click on the (+ Add Icon)
- Select the Subarea control

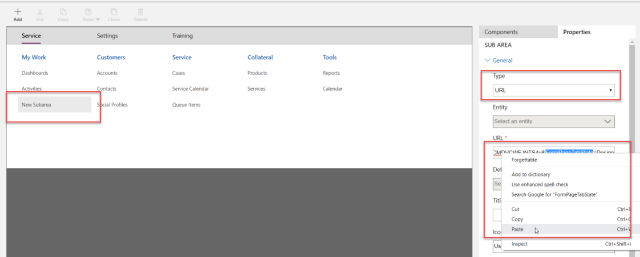
- Click on the new Subarea control on the sitemap
- Identify it as a URL
- Select the URL attribute
- Paste the URL you selected into this attribute, (either Ctrl V, or Right Click and Paste)
- Give the title a name, I like to use Survey
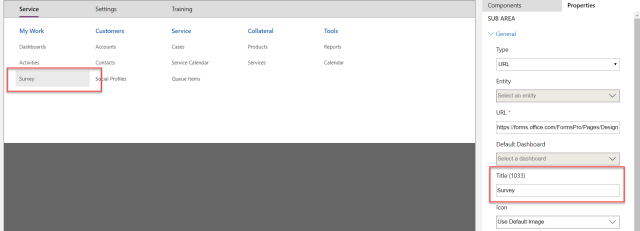
- Click Save then Publish controls located in the upper corner of the sitemap.
- Click Save and Close
- You will now be directed to the main model driven app screen
- Click Save
- Click Validate
- Click Publish
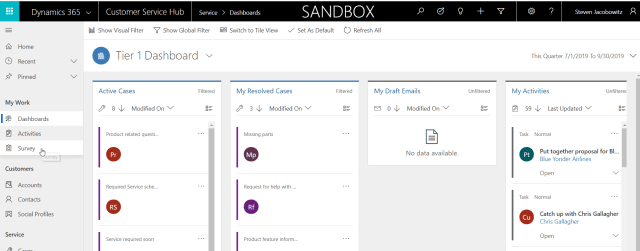
- You can now click on the > Play control to test the results

- Notice you will now have the Survey function on the site map
23. If one of your CSR’s would like to manually send a Survey, then can do so by clicking on the Survey Icon on the sitemap.
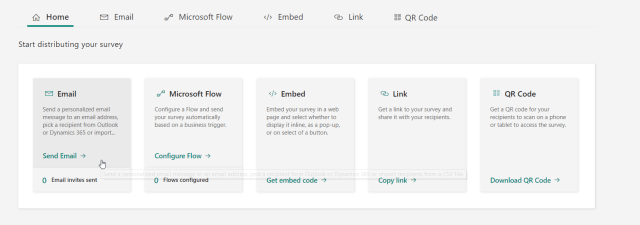
- Click on the Send Survey option
- Click on the Email Option
- Notice you have a automatic email created with the complete body
- If you like you could add additional text to this email.
Note: You could also use the personalize options mentioned in section 1 of this document to personalize the email, although this would only work if you automated the send via Microsoft Flow, (Next Section)

- Type in the To email address
- Click send in the lower left-hand corner
At this point if you would like to send another survey manually all you have to do is click on Compose new email. You would automatically open to the email window again.
Repeat the process above (steps 7 to 21 ).

- Sending Options (Integration with Microsoft Flow)
As we discussed in the last section, your end users can manually send surveys by selecting the email option. The question becomes will they remember to send out the surveys? What are my options for automation? The good news is there is a Microsoft Flow Option that is wizard based.
Let’s try it out:
- Open the survey
- Click on the send survey option button

- Click on the Microsoft Flow , Configure Flow
Note: The next window will give you several options for the survey prior to creating the Flow. Notice there is no To any longer, this will come directly from the CDS record.
- On the middle of the email body form there are several survey options, (see below),
- a Survey Insert option,
- an Unsubscribe option,
- a Personalize option.
Note: The personalize option is my favorite since it is always nice to recognize the client by their name.
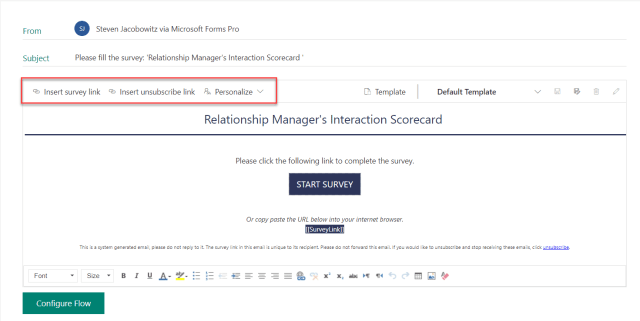
- Place your cursor at the beginning of the subject line
- Click on the personalize option

- You have the option of using the first name or the last name or both.
- Click on the option you would like to use
(Note: if you are using both don’t forget the space after the first name)

- Now that you configured the personalization of the survey
- Click on configure flow
You are presented with 5 Preconfigured options you also have the option to add a new flow by clicking on the + Add Icon
(Note: If you use the Configure from Blank the process isn’t automatic any longer, you will have to pick your trigger, data source and actions.)
- Since we want to send this survey out automatically when an opportunity is closed in Dynamics 365
- I am going to modify one of the Flow Templates
- Click on the Case Close option
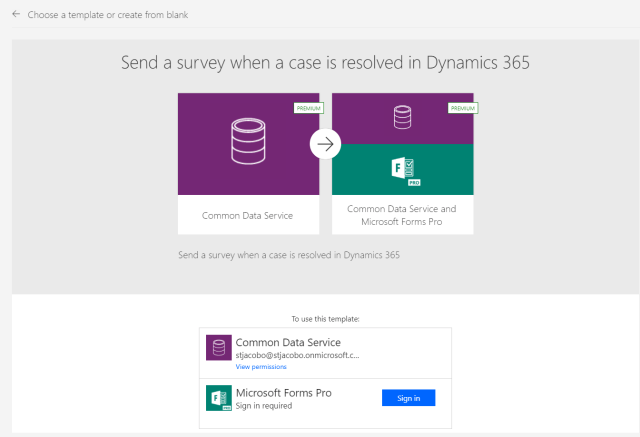
- Notice you are already connected to your Common Data Service
- Sign into the Microsoft Forms Pro, (use your credentials)
- You will see the verification green that is successful

- Click on the continue button
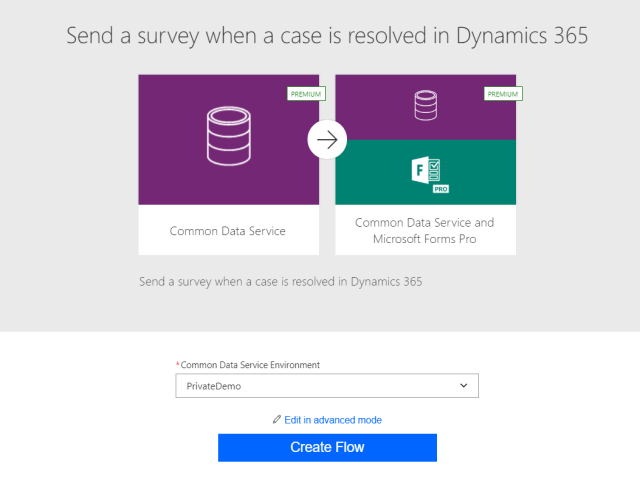
- Select your environment
- Click on Create Flow
- Wait a few minutes while your Flow is automatically configured

- Open the PowerApps Maker Portal
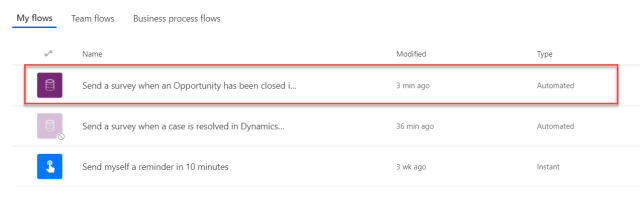
- Click on the flow option on the left navigation menu.
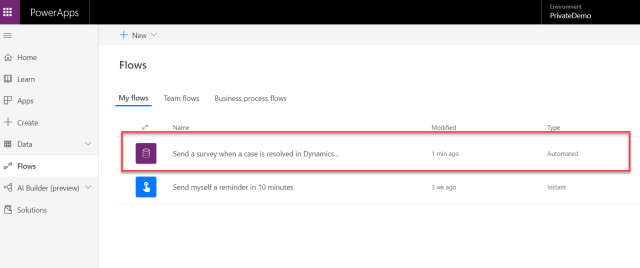
- Notice a Flow was created by the Form-Pro wizard
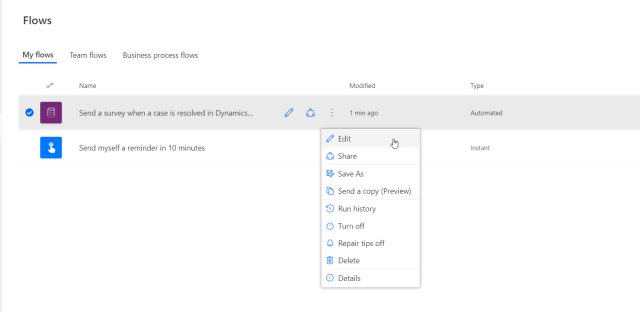
- Click on the ellipsis on the flow just created
- Click on Edit
- I would like to change the focus from the case to the opportunity
- Click on the entity name
- Search for the opportunity entity
- Select the opportunity entity
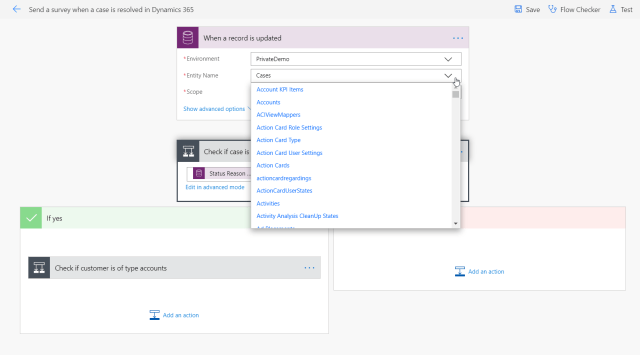
You have now accomplished the following:
- You have changed the CDS entity to Opportunities, (1)

- You can click on the ellipsis and edit the title of the next step (2, 3)
- Finally, you check and replace if necessary, the value of the closed opportunity for the status reason (4)
- Click on Save
- Click on the Flow Checker to validate there are no errors
- At this point you will be able to manually test the flow against actual records in your CDS opportunities, either manually or automatically.
- If everything is clear you can return to the Flow Listing
- As a last step I always navigate to the ellipsis and save the flow as (I give it a name that is consistent with the opportunity function.
- Finally, I disable the original modified Case Flow.
- Let’s end with the additional distribution options
There are additional options for sending or placing your surveys (See Picture Below)

The Embedded Option:

- Your options include Inline, Pop-up and Button.
- Notice you can also personalize by passing parameters from your CDS database into the option you choose.
- You can also add your own custom parameters
- When you click on the generate code button, Forms Pro will automatically create the script you will embed at your website.

The Link Option:
If you choose the link option, click the option and Forms Pro will automatically generate the link to the form’s website.

You can use this link on customized distributions as well as SMS Text Sends, the options are limitless.
The QRC Option:
If you select the QRC option, Forms Pro will automatically generate the QRC code to the survey

In Closing:
Today we discussed some of the additional options that are available from within Forms Pro.
We discussed:
- Personalization
- Auto Access to the Application
- Sending Options (Integration with Microsoft Flow)
Part 3, (next week), I will finish up with these last topics:
- Administration
- Reporting
- Branching Surveys
- Sectioning off Surveys.
My hope is you find these articles helpful and they allow you to see the value of the Microsoft Dynamics 365, Azure and Office 365 Cloud Strategies.
These products are continuing to be evolved, it is Microsoft’s mission “To Allowing every person and organization in the world to achieve more”.
I am sure you will see the value and utility of Forms-Pro. I love the product.
Be Cheerful,