Creating Customer Experience, Cognitive Computing an Enhancement or a Deterrent?

Yesterday I received a new copy of CRM Magazine by Destination CRM . There was a point of view story about cognitive computing called Cognitive Computing Energizes the Enterprise, by Oren Smilansky which I felt compelled to embellish in this post given my past experiences with this topic and CRM.  Before I begin if you haven’t read this article and would like to view it, I would suggest you click on this link.  Mr. Smilansky did a wonderful job outlining where this functionality is currently, and where it will be in the future.

Let me set the stage first.  (I will not mention any product or company names because I would like the reader to be totally impartial. There are many products in the market that claim they function as Artificial Intelligence or Cognitive Computing, I am sure depending on who you talk to there will be opinions of which ones are better.

Two days ago, I went to a Company’s website.  I wanted to sign-up for a test of which, because of my status, I receive a 50% discount automatically.  Needless to say, something was wrong with their systems, I was charged full price for the exam.  My next step was to look for technical support on how I could rectify this situation.  When I clicked on the help tab I was greeted by a Chatbot.

For those that are not familiar with the terminology, from Wikipedia, “A chatbot (also known as a talkbot, chatterbot, Bot, chatterbox, Artificial Conversational Entity) is a computer program which conducts a conversation via auditory or textual methods. Such programs are often designed to convincingly simulate how a human would behave as a conversational partner, thereby passing the Turing test.

I typed in my question, “I am not receiving my discount on xxxx test, how can I fix this situation?”  A moment later I was presented with three documents to choose from, totally unrelated to my question.  The computer program matched key words in my question and returned the answers that were closest to the words I used.

My next step was to type in “I want to talk to someone live.” Again, a return of three documents not related to my question.  Finally, I typed a few inflammatory phrases at the Bot, still nothing happened.  Totally frustrated I closed down the webpage and started searching the site myself, for a phone number, and eventually found it.

I used this illustration for a number of reasons.  If I was a real customer, this event might cause me to leave your company.  A number of companies use this type of technology and believe this is cognitive computing when in reality this is nothing more than an algorithm that is parsing keywords and matching them to articles in a knowledgebase and returning what it considers reasonable responses.

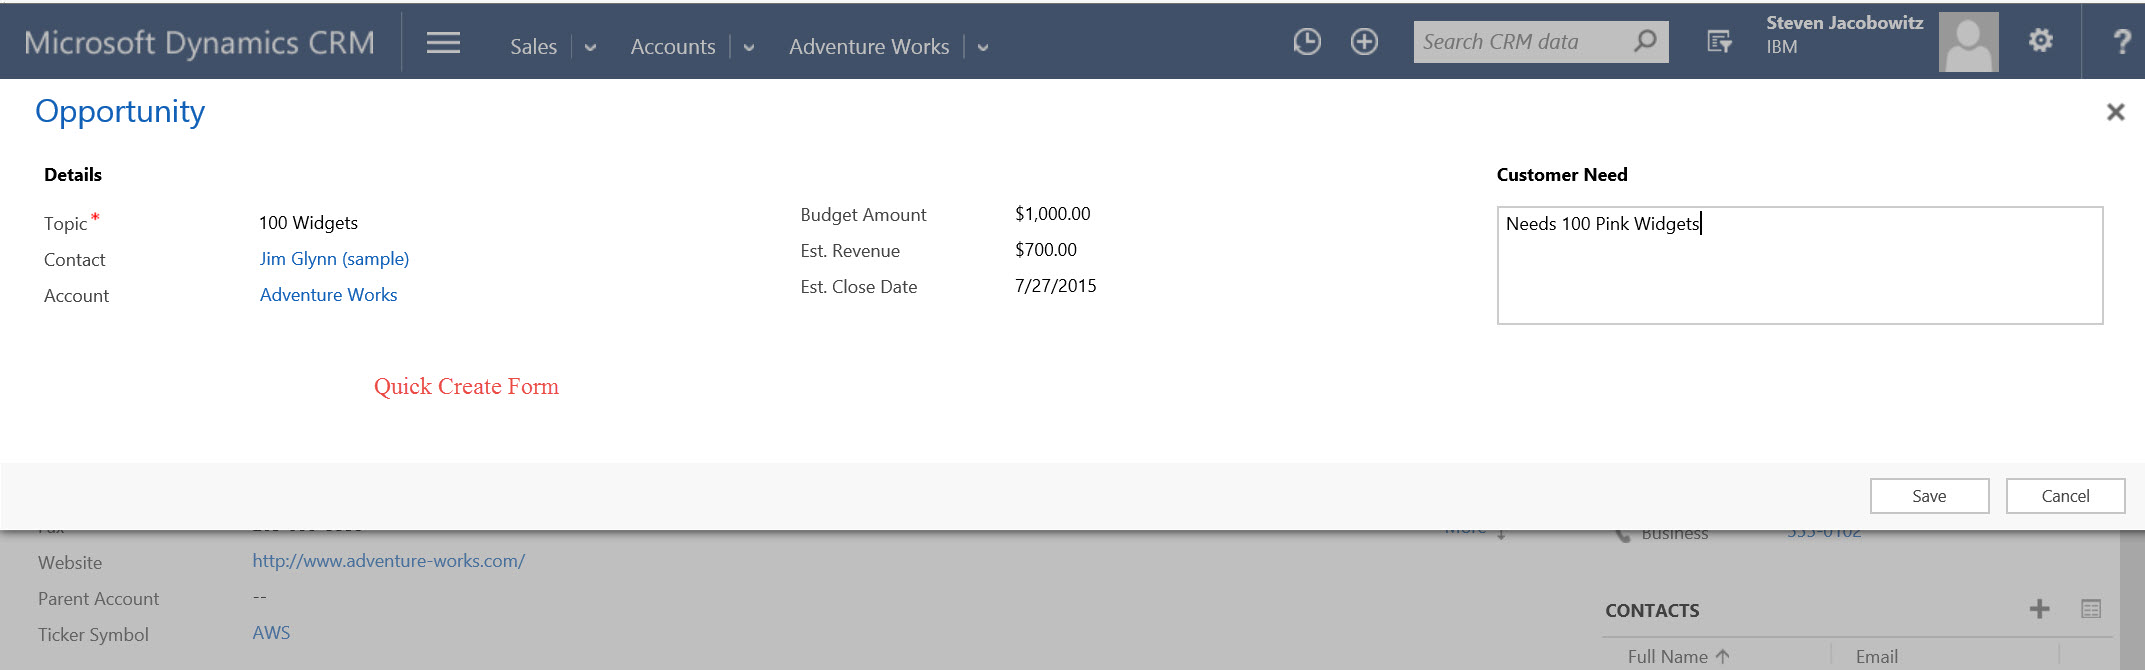
Let me repaint this story in terms of the work I am doing with CRM and Cognitive Computing.  Since I was on a site where I had to log in, in order to get to where I was, I would expect the Chatbot to be able to look at my CRM record and greet me with something similar to Hello Steven.  (A simple return of my first name from a CRM Record).

When I typed in my question, I would have expected the system to look at my record in CRM to see if I had the credential active in order to actually receive this benefit.  At this point if the system was actually configured based on business processes and not just on returning documents I would have expected that a ticket would be created in their CRM system alerting the support center there was an issue.

According to the article I mentioned above, “ The Aberdeen Group found that when companies incorporating cognitive technologies to support customer service interactions, they have seen an 81% improvement in employee engagement rates”. Unfortunately, they say nothing about customer satisfaction rates.

My point, there are companies using Cognitive Technologies to defer costs of valuable people time to machine algorithms.  The feeling is 80% of the questions can be answered within 20% of the time.  There is absolutely nothing wrong with that, but they should go further than just search and retrieve.

Giving “WoW” types of customer experiences should be the goal with all companies.  This will foster a personal experience and in turn garner loyalty.  In my case, I am a captive audience so I am not going to leave this particular company, but in today’s world where there are options, and information flowing so freely, I would expect the focus should be on retaining customers through WOW customer engagement should be just as critical as Organizational efficiency.  Actually, and organization should include the former in their definition of the latter.

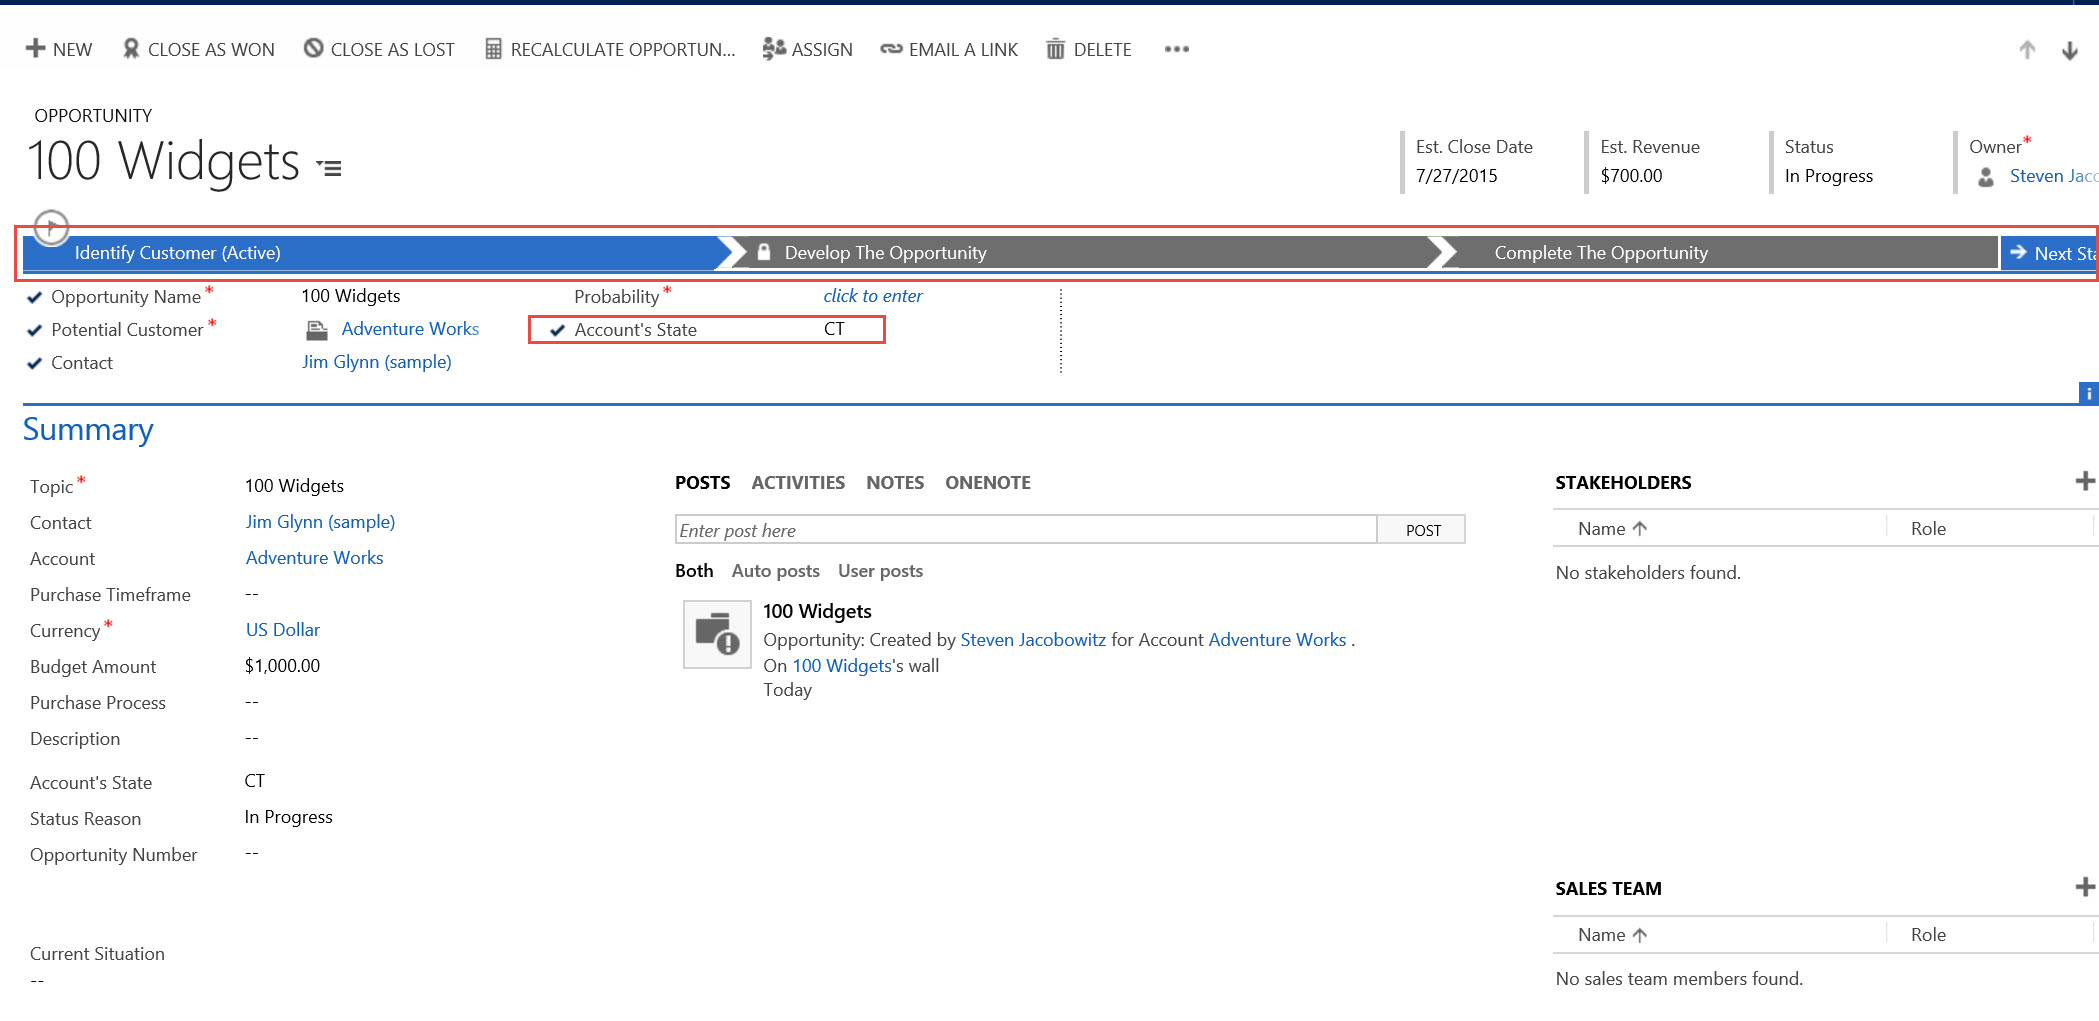
Back to my scenario.  I look for an answer -> I am greeted personally -> I ask a question -> Information stored in one system is retrieved and analyzed -> The system understands there is an issue -> a ticket is created in the CRM system, and sent to the proper support queue -> the system could send me a few suggestions on how to correct this situation, and also reports a ticket was created, gives me the case number, and a phone number I can call to check on the incident.  -> the system also sends the same information to me via email. -> The system asks me if there is anything else I might require -> I terminate the session.  In the background, an email alert is sent to the support personnel responsible for these types of issues, and the entire chat transcript is saved in the CRM record, for support context and future analysis.

This is a simplistic example, my argument is companies should look at their business processes from end to end and incorporate the flow of these processes into this technology, including a feedback loop. By thinking through your processes, you might be able to capture an additional 5% of the issues that are taking the extra effort to complete, without manual intervention.    Wouldn’t it be a hoot if the automated system could make a call to the core system through Business Process Automation and fix the discount switch for me?  This isn’t science fiction, eventually we will get it right.

CAL-Part1-18

Posted in Uncategorized | Leave a comment

Our Plans for Microsoft Ignite, Come Visit

By:

Steven Jacobowitz

Associate Partner, CoC Global Dynamics CRM, MSAccy, MBA/MIS, MCP, MCT

IBM GBS Microsoft Dynamics


As we near Microsoft Ignite 2016 in Atlanta, I’m excited about the great capabilities we’ll be presenting at our booth, such as The IBM Banking Solution™.

The IBM Banking Solution™ for Microsoft Dynamics CRM is my primary focus. It seems like an eternity since we made our first major release of the solution November 2015 at Convergence in Barcelona.  We have been adding to the capabilities of offering and relaunched at Envision, 2016, USA.

I’m convinced the combination of the IBM sector leadership for direction of the solution, and the IBM Solution’s Lab know-how, will transform the customer experiences of our current and future clients, through the value we are adding to The IBM Banking Solution. The solution enables Microsoft CRM to be retail and commercial banking centric.

I’m so proud of what we’ve created that I’m presenting a series of three sessions to demonstrate the unique functionalities of the solution, and how this solution can benefit the banking industry.

Session 1 on Monday focuses on customer self-service experience and the unification of the customer care agent.  View a future bank’s portal using ADX Studio; we even have a client login page with some ideas for you.

Get details: Here

A common theme among banking institutions is first call resolution and decreasing agent time spent providing support.

We’ll share an intriguing demo on how we’re deploying Machine Learning (Cognitive Computing), to handle first-level interactions without involving a live agent. Come see how we’ve integrated IBM’s Cognitive capabilities into Skype for Business and Microsoft Dynamics CRM— all on ADX Studio. We’ll also discuss Unified Service Desktop for customer driven live interactions.

Session 2 on Tuesday focuses on Sales Process and Customer 360-degree views. We plan to demonstrate a few new features we have been working on which address the consolidation of Household information on one screen.  We will finish the demo with an Omni-channel Business Sales Process.

Get details: Here

Session 3 on Wednesday focuses on the importance of customer behavioral profiling. We’ll demonstrate our vision of how to consolidate disparate information from various sources — such as Social, Core Banking, and CRM on a common platform, Azure — and deploy our cognitive analytics engine, on this data store to profile client behavior. This data is subsequently integrated back to Microsoft Dynamics CRM on the corresponding contact record.

Get details: Here

Our aim is to provide this information to bank’s sales and service departments, so employees have a clear understanding of how client behaviors could influence their interactions. This platform is the foundation for our Predictive Analytics Engine, using IBM’s SPSS. We’ll demonstrate how this information is used to analyze trends and translate the results into next best actions and next best product suggestions in Microsoft Dynamics CRM.

Come to the IBM Booth #511 at Microsoft Ignite, and let us show you the great ideas we’ve been working on. Though this solution is focused on Financial Services, a lot of capabilities could be translated to other industries.

I’m looking forward to seeing you all at Microsoft Ignite. Let’s share some ideas.

Steven Jacobowitz

Posted in Uncategorized | Leave a comment

General Availability of Spring 2016 Wave of Dynamics CRM and New Connected Field Service Solution

General Availability of Spring 2016 Wave of Dynamics CRM and New Connected Field Service Solution

STEVEN J. JACOBOWITZ | Today 5:00 AM| 1 View

Folks –

The Spring release of Microsoft CRM went live on Monday.  In keeping with Microsoft release cadence, these new features will only be available to On-line users.  During the fall release, 2016 Microsoft will catch up the On-premise edition with what was released on Monday along with any new features.  Currently, if you signup for a 30 Day trial of the product On-line you will have available to you the new features.  Please be aware if you are used to Office 365 administration center, there have been some changes on the User Interface so be prepared to get acquainted all over again.

To learn more about this release at Microsoft’s Website please follow the link:

https://www.microsoft.com/en-us/dynamics/crm-customer-center/get-ready-for-the-next-release.aspx

My Best,

1 - SignatureSteven

Posted in Uncategorized | Leave a comment

The 360-degree Path To Winning In Banking

Staying competitive in banking means gratifying customers with every interaction. But in today’s volatile marketplace, that can be easier said than done.

Customers have more options for banking than ever. And the banks that win their business are the ones that provide products, services, offers and communication tailored to their needs and preferences.

What does it take to provide this level of customization? A 360-degree view of customers at practically all times. One that enables you to:

  • Know your customers inside out, including their preferences, needs, desires—and even social media commentary about your products
  • Recommend and deliver services to customers, before they even need them
  • Make more effective offers to customers—and know how, where and when to make them

With this holistic view, the possibilities for enhancing the customer experience are virtually endless.

But gaining this level of insight requires robust technologies, such as mobile, analytics, next best action/product, gamification, digital signature, self-service and social capabilities. Integrating and implementing these solutions can be challenging for many banks, not to mention costly.

That’s why IBM has consolidated these capabilities into one easier end-to-end solution.

Download the solution brief, “IBM Banking Solution for Microsoft Dynamics CRM” to learn how you can use the power of analytics and Microsoft CRM to elevate the customer experience.


Learn more:

For the latest industry insights you can follow IBM Banking on Twitter and join the conversation around the latest industry events, trends and much more by using #IBMBanking in your tweets!


Leave a comment
Steven Jacobowitz

About Steven Jacobowitz

Steven Jacobowitz has more than 24 years of professional experience in the Software Industry specifically full lifecycle implementations of CRM. Steven has experience in building, growing, managing and selling of two successful regional CRM companies. In addition, he has worked in various capacities including Business Analysis, Project Leadership, Solutions Architecture and Functional Consultant at national and global CRM practices. Steven has participated in over 250 full life cycle CRM implementations.

This entry was posted in Banking and tagged , , . Bookmark the permalink.

Leave a Reply


Posted in Uncategorized | Leave a comment

New Microsoft CRM 2016 Video Blog Found on Linked In

Good Morning Folks –

I opened my Linked In this morning and found this Video Blog on the top of my view list.  Thought you might enjoy looking at what is coming up in MSCRM, (I guess they are calling it MSCRM V 2016).

Watch Here

My best,

Steven

Posted in Uncategorized | Leave a comment

Office 365 Groups and Microsoft CRM – An Exciting New On-line Functionality in Beta

Good Day All–

I am pleased to write about a new feature in Microsoft CRM / Microsoft Office 365 called Office 365 Groups.

This is exciting new functionality in Beta found at the Microsoft Office 365 / CRM site.

Office 365 Groups allows users to team and collaborate across your company. This functionality enhances integration between, Microsoft CRM, Outlook Email, Outlook Calendar,  SharePoint and OneNote. One feature of the collaboration, the user of Office 365 does not have to be a consumer of Microsoft CRM to be a part of these groups.

All alerts, notes and documents will also be available to the user on Outlook for Office 365.

You can create a group for your sales / support team and invite other Office 365 users to join the group.   When they accept the shared users can view documents, conversations meeting notes and OneNote information related to a specific entity identified on the CRM interface.  For example, below.

MSDOG_Pic4

Important

This preview feature is available with CRM Online 2015 Update 1 and is only available in English.

Prerequisites

  • For Microsoft Dynamics CRM Online organizations, this feature is available only if your organization has updated to Dynamics CRM Online 2015 Update 1. Interested in getting this feature? Find your CRM administrator or support person. This feature is not available for Dynamics CRM (on-premises).
  • Before you can start using Office 365 Groups, make sure it’s turned on. For more info, see Enable Office 365 Groups.

I have also left the announcement of the functionality which will sound a bit like the rest of this post at the following location: Click Here

Set UP

The setup is relatively straight forward.

First go to the CRM Office 365 Online Administration Center.

MSDOG_Pic1

Click on CRM Administration

Click on Updates

Highlight the office 365 Group Preview and click on install

MSDOG_Pic2

Open Microsoft CRM once this process is completed

Click on Settings notice you now have a new item called Office 365 Groups

Click on the tile

MSDOG-Pic5

Entities you will allow collaboration on are identified on this screen.

Click on Add Entity notice you can define each entity by selecting

MSDOG_Pic2-a

Also notice there is an Auto Create option, (This option will automatically create the collaboration space each time a new entity identified is created through the CRM interface).

MSDOG_Pic2-b

Once you complete the entity identification process click on the Publish All activation button

MSDOG_Pic2-c

MSDOG_Pic3

Create a group

Go to the record that you want to create a group for. For example, Go to Sales > Cases. (How do I get there?)

Choose a case

On the navigation bar choose the account name and then choose Office 365 Groups.

MSDOG-Pic6

In the Welcome to Office Groups! section, choose Create Group.

MSDOG-Pic7

Creation screen will look as follows:

MSDOG-Pic8

When the rendering is completed your new collaboration space will appear under the specific case as follows:

MSDOG-Pic9

You now have the following options both inside MSCRM and outside using Office 365

Adding Team Members

Use this option to add members from Office 365 Users.   This way you will collaborate both from CRM and outside of CRM on the individuals Outlook Calendar

Collaboration outside of Microsoft CRM:

You now have the following options of collaboration located on the entity record and also on your Outlook Office 365, (if you are not a Microsoft CRM user).

First go to your Office 365 Menu and select Mail to view the groups you have joined,

MSDOG_Pic13

This is viewed from your Outlook Office 365 Mail interface.

MSDOG_Pic15

Notice when you click on the Join Notification you have several options from your Mail interface

  1. To Start a Conversation
  2. To View Group Files
  3. To Use the Group Calendar

MSDOG_Pic24

Now go back to your Office 365 Menu and select calendar

Calendar Integration

Select the Calendar Icon

MSDOG_Pic14

Notice you now have a calendar entry for each of the groups you are a member of. If you want to create an appointment from your calendar the entry will also resolve to the related entity record the group is associated with.

Join a meeting or set a calendar event

Group meetings help all members coordinate their schedules. Everyone in the group automatically sees meeting invites and other events.

  • Choose the meeting title to view meeting details. If the meeting is an online meeting and you have Skype for Business installed, choose the Join link to directly join the meeting.

MSDOG_Pic20

MSDOG_Pic21

Start a conversation

Having a group conversation is a way to communicate with group members. The conversations section displays each message, where you can read, reply to, and create new conversations.

  • To start a new conversion, in the Start a group conversion box, type in your message.
  • In the Conversations section choose a conversion to read and reply to it.

If you are not a MSCRM user your conversations will be viewable from the Microsoft Office Outlook 365 interface

MSDOG_Pic23

Add notes

Share notes with everyone in your group using the OneNote notebook. OneNote lets multiple people write in the same notebook, on the same page, at the same time, and it automatically merges everyone’s changes.

  • In the Notebook section, choose the group’s notebook. When OneNote opens, add your notes.

MSDOG_Pic16

MSDOG_Pic17

MSDOG_Pic18

Share documents

When you create or upload a file in the group’s OneDrive for Business page, it’s automatically shared with all members of the group. When you add members to the group, they automatically get shared access to the files. By default, only group members have view and edit access to the files. When you create a group in Microsoft Dynamics CRM, it’s set to private, so only the group members can see information about the group including files, conversations, or even the group itself.

  • To see the latest list of documents, refresh the list using by choosing the refresh icon.
  • To upload or manage all of your documents in OneDrive for Business, choose Open OneDrive.

MSDOG_Pic19

In Conclusion, this functionality will allow users to collaborate from within Microsoft CRM and outside using Office 365. This new integrated functionality will increase your organization’s efficiency by enabling your team to collaborate using familiar business productivity tools.

If you have access to Office 365 and Microsoft CRM online I would suggest you investigate.

Until my next post, my best,

CAL-Part1-18

Posted in Configuration CRM 2015, CRM 2015 New Features, CRM 2015 Spring Release On-Line, CRM Announcements, CRM Integration, Office 365 Groups | Tagged , , | Leave a comment

Depreciation of Microsoft Silverlight in Microsoft Dynamics CRM and Microsoft Dynamics Marketing

 Good Morning –

I just received this email from Microsoft today regarding the future state of Silverlight.  I thought it would be something everyone should consider going forward when customizing MSCRM and MDM.

Thanks for reading,

CAL-Part1-18

Microsoft Dynamics Marketing uses Silverlight to deliver digital asset management capabilities, such as uploading, marking up, or annotating files. However, support for Silverlight is going away in some browsers.

Support for Silverlight has been discontinued in the upcoming Microsoft Edge browser. Support for Silverlight was also disabled by default in Chrome (with the option to override). With the latest release of Chrome (in September), the override and Silverlight support are expected to be permanently removed.

Your users can continue to access Silverlight components for digital asset management capabilities by using Internet Explorer 11, Firefox, and Safari, as these browsers still support Silverlight.

We are planning to replace the application components that use Silverlight with HTML-based components over the next few months.

In Dynamics Marketing 2015 Update 1.2, the application will support HTML-based components for use in browsers that no longer support Silverlight, which will give users the ability to:

  1. Upload files
  2. Search, retrieve, and access files and folders
  3. Access folders and attachments related to any entity record

However, the following capabilities that rely on Silverlight will not be supported on non-Silverlight compliant browsers in Dynamics Marketing 2015 Update 1.2, but are planned to be supported in or beyond Dynamics Marketing 2016

  1. View or add markups to image or document files
  2. Access their file library to obtain a filtered view of folders marked as libraries
  3. Insert files in social media messages and emails drafted using the drag and drop editor

Soon after Dynamics Marketing 2016 Update, we expect to permanently deprecate and remove Silverlight-based components. Users will have access only to the new HTML-based replacements for Silverlight components.

Please refer to Silverlight deprecation affecting digital asset management in Dynamics Marketing for updates on this topic.

Sincerely,
The Microsoft Dynamics Marketing Team
Posted in CRM On-Line, MDM, Microsoft Dynamics Marketing | Tagged , | Leave a comment

Constraining Parameters at the Attribute Level for Root Cause Analysis

Good Afternoon All –

It seem as though I continue to be asked for the same requirement from clients and felt it would be a good idea to share another one of my “secrets” in this forum. So many times I hear, I want my users to select a value in one field, and have only values that correspond to the first value to be made available in the next field.

The good news is Microsoft CRM can be configured to perform this type of functionality without the use of code, which I will demonstrate below.

Scenario:

Our Customer Service Manager, (for the First National Bank of Gotham) would like to capture information based on initial contacts to the call center. He would like to capture each of the incidents down to the root cause. The manager has determined most of the incidents reported can be fully defined by the fourth level, therefore, he has determined the first level should be initiated from the subject of the case, 2 level based on the subject, 3rd level based on the 2nd level, and finally the root cause of the incident reported.

He discussed these requirements with his solution architect, and asked him to configure a solution on the cases to meet these requirements.

Solution:

In cases such as these I would require to draw a diagram to validate my initial idea.   Please see the below diagram.

RCA-Pic1-A

Notice in order to create the solution we would have to create three additional entities. In effect, by starting with the Subject and adding the Second Level Cause Entity we can relate the two by the lookup of the title of the subject. This will allow us to identify multiple second level causes for every subject or 1:N from the subject to the second level causes. We can use this same logic to relate the third level cause to the second level cause, and the root cause to the third level cause.

It seems easy enough right? Let see.

First, we must define the values of the subjects

Browse out to the settings tile

RCA-Pic1

Move to business settings

Double click on subjects

Click on add a subject

RCA-Pic2

Add a tile and click on save

Now if you want to create subjects that are related to the top level highlight the subject you just created and click on add a new subject

RCA-Pic3

Notice you retain the parent subject on the link

RCA-Pic4

Type in a title for the “Sub-Subject’ then click on save

RCA-Pic5

Continue these steps until you have the entire subject tree defined

RCA-Pic6

Our next step is to create a solution for the root cause analysis entities

Browse to settings then solutions

Click on new and name your solution to identify the solution publisher, the version and the entity and attribute prefix, click on save.

RCA-Pic7

The first step is to add a new entity called Second Level Cause

Open up the form and create a lookup from the Subject Entity call the relationship subject and identify it as Business Required

RCA-Pic9

Save the entity

Next, create a new entity called Third Level Cause

Open up the form and create a lookup from the Second Level Cause Entity name the relationship attribute, Secondary Cause and identify it as Business Required

RCA-Pic10

Save the entity

Next, create a new entity called Root Cause

Open up the form and create a lookup from the Third Level Cause Entity, call the relationship to attribute Third Level Cause and identify it as Business Required

RCA-Pic11

Save the entity

The next step is to create N:1 Relationships as follows (1) for Case : Second Level Cause, (1) for Case : Third Level Cause and (1) for Case : Root Cause (Note this is vital because we require all of these attributes on a case form. The creation of these relationships to the new entities will allow you to include the necessary attributes on the form.)

RCA-Pic11-A

Add the Case entity to your solution

Open the case

Add the 3 lookups from the previous step to the case entity

RCA-Pic12

Save the form

There is one more step required; we would like to limit the child selection value options based on the choice of the parent value. We would like to accomplish this at the second level cause, the third level cause and the root cause. Microsoft CRM has a feature called filtered views which we will deploy for this functionality.

Select the Second Level Cause attribute on the form

Double click

RCA-Pic18-a

Notice the Record Related Filter Options

Check the use of a filter only when the Subject, (from the parent record) is related to the Subject, (Second Level Causes) (This setting will allow only second level causes to show when instantiated by a subjects title)

Click the Ok Button

Repeat the same procedure for the Third Level Cause attribute

RCA-Pic18-b

Click Ok

Repeat the same procedure for the Root Cause attribute

RCA-Pic18-c

Click Ok

Save the Form

Close the form

Publish all customizations

Solution in Action:

Let’s take a look at the results

Let’s start with a case record, Identify the subject as Internet Banking

RCA-Pic13

Click on the Second Level Cause look-up; notice the choices are only showing that are related to Internet Banking

RCA-Pic14

Select Login as the choice for Second Level Cause, then click on Third Level Cause look up; Select Browser Options

RCA-Pic15

Notice the options available at the root cause are only associated with Browser issues.

RCA-Pic16

Let’s take another example, suppose we select password as the Third Level Cause, notice the only option under Root Cause is User Forgot.

RCA-Pic17

There you have it, a quick non programing method for creating constraining attributes based on a selection decision of the previous attribute. Of course, we can go deeper in the relationship tree just as we can also make it a two attribute relationship decision. The choice will be dependent on your customers.

My hopes, you can make use of this knowledge.

I am going to try to be a little more consistent in frequency of posts going forward.

Hope you have a sparkling week!

1 - SignatureSteven

Posted in Configuration CRM 2015, CRM 2015 Requirements, CRM Configuration | Tagged , , | 1 Comment

Working with Business Process Flow Tips and Tricks Part 2:

Good Day All –

Last month, (sorry for the delay, client requirements first priority), we discussed business process flows and I provided a few tips and tricks. As a reminder there are several reasons for using business process flows for your solutions.

To recap a few:

  1. Using Business Process Flows will assist your organization follow consistent processes throughout the application.
  2. Configured properly you can lead your users of the system into next best actions including launching workflows and business rules.
  3. Business Process Flows can be set up to prevent movement from one stage to the next unless valid data is entered into the system, (called a stage gate).
  4. You can enforce stage process analysis through reporting by enforcing consistent processes.
  5. Finally, you will have the ability to move a user from entity to entity since Entity Business Process Flows can be configured to create or link related entities to the primary entity.

As I promised I will define a scenario to build out the next few tips I want to discuss:

  1. Branching Business Process Flows – Conclusion
  2. Movement of Stages in the Process
  3. Enabling Security Roles
  4. Order Process Flow

Scenario:

Last week we created a business process flow that was linked to a new opportunity. At that time we defined the Opportunity Name, Account, Contact and Probability of the opportunity, (We used Stage Gate on the Probability).

Today we want to enhance the business process flow.

Our manager just discussed the requirements with our configuration expert.

Required:

“If the account associated with the opportunity is located in New Jersey we want the ability to reassign the Owner of the opportunity to one of our other sales people.

When this reassignment stage is completed or if the stage is not required we what our process to force our Sales person to create a phone call to discuss the opportunity with our client account. We would like to make sure the stage is set to research.

We would then require the sales person to complete the phone call with the client and complete the opportunity as either won or lost.”

Execution of the Scenario:

Through this scenario we will demonstrate how to solve the execution of this requirements using Microsoft CRM out of the box functionality without the use of custom code.

Our first step will require us to move the State field in the client account record to the opportunity on creation of a new opportunity. (We will need to have this value in order to evaluate the state in our branching statement).

1. Open up your solution:

BPF-2-Pic2

2. Expand on the entities tab, expand the opportunities entity, and add a new attribute called Account State which is a single line of text and 50 characters in length.

Important: (Remember when mapping attributes from one entity to another, the field types and field lengths have to match).

BPF-2-Pic3

3. Place the attribute on the opportunity form

BPF-2-Pic4

4. Save and Close the form, than publish your changes.

5. Your next step is to expand the account entity of your solution. Expand the 1:N relationships and identify the relationship associated with the opportunity.

BPF-2-Pic5

6. Double click on the relationship

BPF-2-Pic6

7. Click on New and map the Address1_StateProvence to the Opportunity Account State attribute

BPF-2-Pic7

8. Click ok button. Click Save and then Click on publish.

BPF-2-Pic8

Remember our first stage in this process was to create an opportunity.

BPF-PhoneCall-Pic 2g-a

9. Your next step is to browse back to the Process section of your solution. Open up the New Process Sales we started last week. Click on the stage + sign to add a new attribute and add the Account’s State.

TIP

(NOTE: This is very important because in order to create a branch, which is our next step, we always have to have the attributes we are evaluating on the form of our previous stage otherwise the application will register an error BPF-Pic1a

10. Next click on the branch icon located below the stage.   We can now identify the condition for the branch, Account’s State = “NJ”

BPF-2-Pic9

11. Click on the check at the bottom of the condition in order to save the condition. Please Note: The condition identified can be complex. In order to define another condition click on the + below the original condition.

BPF-2-Pic10

As you can view below you have the ability to create requirements for multiple conditions by using the .AND. operator or evaluate options by using the .OR. Operator.

BPF-2-Pic11

12. Our next step is to add the stage required if the condition is met. Account’s Stage = “NJ”

BPF-PhoneCall-Pic 2b

13. Now we can jump to the next step and set up the qualification phone call.

BPF-PhoneCall-Pic 2a

Notice the options available when setting up a stage.

14. The next step in the process is to create a stage for completing the phone call, although we only want the branch when the actual end is not completed

15. Click on the branch at the bottom of the stage and define the condition for the stage branch Actual End Time is equaled to blank.

BlankBranch

16. Click on the complete check at the bottom of the screen when completed

17. Now click on the stage at the bottom of the Business Process Flow and create the Complete the Phone Call Stage. Define the attributes required for your to complete at this stage. (Notice when you make attributes required at the end of the stage you are not permitting the agent to move forward on to the next stage until the information is completely filled out. (Stage Gates)).

BPF-PhoneCall-Pic 2c

At this point your Business Process Flow should appear as below.

BPF-PhoneCall-Pic 2d

18. Our last step is to complete the last stage of this simple process and complete the opportunity once the phone call is completed. At the bottom of the previous stage prior to the branch click on new stage. Define the attributes you require to complete the opportunity process.

BPF-PhoneCall-Pic 2e

Notice below our entire process is defined.

BPF-PhoneCall-Pic 2f

There are a few more steps required before you are ready to test this Business process flow. Notice at the top of the screen on the toolbar.

BPF-PhoneCall-Pic 2g

You can Order the business process.

By ordering the business process you can determine which flow will automatically open when the entity is created.

1. Click on Order Process Flow Button.

2. You can position the flow on top using the up arrow. If there are no security considerations, anytime a new opportunity is opened, this process flow will automatically render at the top of the opportunity.

BPF-PhoneCall-Pic 2h

Enable Security Roles for Business Process Flows:

Using this option will allow you to assign specific processes to user roles. Therefore, if a user role is assigned to a Business Process Flow, the user will automatically open to the Process Flow assigned to their role.

1. Click on the Enable Security Roles Button.

BPF-PhoneCall-Pic 2i

You can define the roles you would like to associate the Process Flow. Please note that only these roles will see the process on the opportunity.

In addition, if you would like to default a specific Process Flow to this group, it would have to be at the top of the list of processes assigned to the group.

Finally we can activate the business process flow on the tool bar.

BPF-PhoneCall-Pic 2j

1. Click on the Activate button and confirm the activation.

Testing the Process Flow:

Let’s create a new opportunity for Adventure Works.

Go to the account record and to the opportunity section and click on the + sign on the grid to create a quick create opportunity.

BPF-PhoneCall-Pic 2k

Fill in the information on the quick create opportunity form.

BPF-PhoneCall-Pic 2l

Save it and reopen the opportunity.

BPF-PhoneCall-Pic 2m

Notice we automatically open the new sales process business process flow automatically on the opportunity.   Also notice we are showing 4 stages on the opportunity, (Adventure Works happens to be in New Jersey).   Let’s change the state to CT to test the first branch.

Notice how one of the stages is removed from the Process Flow.

BPF-PhoneCall-Pic 2n

Let’s put Adventure Works back in CT. Try to click on the left “Next Stage” option. Notice you cannot move forward because you haven’t filled in the probability, (Red Star = Required Field, Stage Gate).

BPF-PhoneCall-Pic 2o

Let’s add the probability to the first stage and click on the “Next Stage” option again.

BPF-PhoneCall-Pic 2p

Notice the flag is hovering over the next chevron, (stage). At this point you can update the opportunity owner if required. Click on “Next Stage”. Since there is no phone call associated with the opportunity or the account you are prompted to create the phone call automatically. Click on create + on the bottom of the dialog box.

BPF-PhoneCall-Pic 2q

Notice the phone call is opened with auto fill information from the opportunity record.

You are now at the Phone Call Entity of the Opportunity with required information to be filled in. Also notice the flag is automatically moved to the phone call stage as required to let you know where you are in the process.

BPF-PhoneCall-Pic 2r

Click on Next Stage button and notice you now have to enter in the actual end of the phone call.

BPF-PhoneCall-Pic 2s

Complete the phone call from the top of the form menu.

You are brought back to the opportunity to complete the status of the opportunity, in this case purchase and close the opportunity as Won.

This was a very simple example of a business process flow, I hope I was able to display the primary features included in this functionality within MSCRM.

Using Business Process Flows you will be able to create a number of otherwise complex processes your company might be following, while enabling your users of the system with step by step guidance on completing their work.  Using this tool will foster consistency in execution, predictable results and logical reporting.

Again thank you for reading and if you have any comments or suggestions, please contact me at this Location .

My best,

CAL-Part1-18

.

Posted in Business Process Flow, CRM 2015 New Features, CRM 2015 Spring Release On-Line, CRM Configuration, CRM Workflow | Tagged , , , | Leave a comment

Working with Business Process Flow Tips and Tricks

Good Day All –

I was creating a new Business Process Flow this morning and I felt there were a few items that I would like to share to make your experience easier when configuring these for your individual businesses.

Reason for Business Process Flows:

“You can help ensure that people enter data consistently and follow the same steps every time they work with a customer by creating a business process in Microsoft Dynamics CRM 2015 and Microsoft Dynamics CRM Online 2015 Update. For example, you might want to create a business process to have everyone handle customer service requests the same way, or to require people to gain approval for an invoice before submitting an order.” (1)

Using Business Process Flows will assist your organization follow consistent processes throughout the application. Configured properly you can lead your users of the system into next best actions including launching workflows and business rules.

Business Process Flows can be set up to prevent movement from one stage to the next unless valid data is entered into the system, (called stage gating). You can enforce stage process analysis through reporting by enforcing consistent processes. Finally, you will have the ability to move a user from entity to entity since Entity Business Process Flows can be configured to create or link related entities to the primary entity.

Three Methods for Access the Business Process Flows:

There are three methods of accessing a Business Process Flow:

  1. From the Settings tab you can create Entity Business Process Flows through the Processes tile

BPFTT_Pic1

2.    By accessing the Default Solution by clicking on Setting Tab and clicking on Customizations Tile

BPFTT_Pic2

Then click on Customize the System Menu Option

BPFTT_Pic3

Expand the Components Click on Processes and then New

BPFTT_Pic4

3.   By accessing through a Solution Set, (My preferred method).My reasoning is I am not changing the default CRM solution and I would be able to move the solution with all configured Business Process Flows through a Managed or Unmanaged Solution set.

Click on Settings, Solutions

BPFTT_Pic5

Click on New Button, Define the Solution parameters than click on Save

BPFTT_Pic6

Once saved you can click on the processes tile from the left navigation and click New

BPFTT_Pic7

Tips and Tricks:

Setting Stage Category Option Set Values

Stage category option values are important for entity business process flows for reporting and dashboard requirements. Setting up reporting based on Entity process flows by using the stage values as identifiers will allow you to view data based on stage position in the process. If the process is accurate and your agents are working the processes consistently you will be able to forecast results based on stages. In addition, using terminology that is familiar to your agents and your business processes will enhance the adoption probability. Let’s try it out.

All Stages are identified in a global option set called Stage Category. To access open up your solution, click on the option set tab.

BPFTT_Pic8

Open by double clicking on the display name.

BPFTT_Pic9

These are the out of the box stage categories, you can add additional by clicking on the + sign to configure for your processes, or you can edit the items by selecting one and changing the label from the label option on the right.

BPFTT_Pic10

Always Remember to Set the Stage Category

After you define the option set labels, you can configure the stages using terminology familiar to your agents as well as the stage categories familiar to you for reporting purposes.

Go to your solution -> Processes and click on new to create a new process or double click on an existing business process flow to edit.

BPFTT_Pic11

When creating a new process flow you will be required to give it a process name and also a category. (The category defines the new process item as a business process flow)

BPFTT_Pic12

Choose the entity you wish to originate the process from, (in this case we will be using opportunities).Then click on OK.

BPFTT_Pic13

Your next screen will be the business process flow workbench.

Notice there are several actions you can perform. On the very top left of the initial stage change the “Enter a stage name identifier” to the first step in your process, (Tip use common terminology embraced by your organization).

BPFTT_Pic14

Also assure you identify the proper stage category, (as mentioned previously this will assist you in your eventual reporting requirements).

BPFTT_Pic15

Notice on the bottom of the stage there is a menu item for creating additional stages and branches.

BPFTT_Pic16

Branching Business Process Flows – Introduction

Stages are configured when there is no need to alter a linear process. Branches are configured when an action occurs that would potentially require and if/else branch in the process.

Movement of Step Attributes within the Stage.

Finally identify values and step names within a stage are the attributes you would like to have entered into the record based on the stage in question. Please note you can use attributes from the entity you have defined when creating the process flow only in the first stage. After this first stage in subsequent stages you have to option to create based on related entities to the primary entity, for example, Phone Calls. (Much more as we move forward).

BPFTT_Pic17

Notice under the step name the default identifies are the default names of the attributes I selected for the stage. You can modify the step identifiers by clicking in the attribute and re-typing a new name.

BPFTT_Pic18

Also notice on the right of each attribute there is a checkbox for required. You can use this to require input. This is helpful if you want your agents to fill in information required. By creating a required attribute you will prevent your agents from moving to the next stage prior to completing information in the stage, (called stage gate).

BPFTT_Pic19

I can see that I am getting long winded again so I am going to end this post after I go over a few last items, and will take up the remainder in next week’s entry.

Thus far we discussed the reasons for the use of entity business process flows, and how they will assist your organization maintain consistency. In addition, they will assist your users with next best actions when moving through a business work stream, thus providing you with reliable reporting. We went over the methods for creating a new business process flow and my recommendation to always configure in a solution set. Finally I provided a few tips and tricks during the configuration process as well as a few best practices.

Next week I will fully define a scenario so the remaining best practices will be easier to follow. In addition I will complete the tips and tricks section with the following items:

  1. Branching Business Process Flows – Conclusion
  2. Movement of Stages in the Process
  3. Enabling Security Roles
  4. Order Process Flow

My intentions are to assist in your understanding of how useful process flows are for your organization.

One last tip, please validate your processes, make sure they work in your organization. My last words “A poorly planned process automated will only provide you with poor results faster”.

As Always,

CAL-Part1-18

  1. Footnote Here
Posted in Business Process Flow, CRM 2015 New Features, CRM 2015 Spring Release On-Line, CRM Workflow, Workflow | Tagged , , , , | 1 Comment